
Table of Contents:
Selecting a Refined Palette of Gold, Silver, Champagne, and Crystal
A refined palette begins with a clear ratio, not a crowded mix. Choose one dominant metal, one supporting tone, and a pale reflective accent. For example, warm gold can lead, champagne can soften the scheme, and crystal can provide sparkle. Silver works best when the room already has cool stone, glass, or polished nickel.
Keep the undertones aligned. Yellow gold and creamy champagne create a warm, intimate mood. Bright silver and icy crystal feel sharper and more architectural. Mixing them can look elegant, but only when one temperature clearly leads. A useful rule is to let the main finish cover about 60 percent of the arrangement, the secondary finish 30 percent, and the final accent 10 percent.
Material matters as much as colour. Brushed metal absorbs light and adds quiet depth, while polished metal creates a crisp focal point. Mercury glass gives silver a softly aged surface. Clear crystal catches direct light and sends small flashes across nearby walls, mirrors, and tabletops. Satin champagne finishes sit between matte and glossy, which makes them especially useful in rooms that need warmth without visual heaviness.
Before buying, examine the room in daylight and after sunset. Artificial light can turn gold more orange and make silver appear blue. Place a sample ornament near the largest reflective surface, then step back several feet. Does the finish support the room, or does it shout? That small check prevents an expensive palette from becoming fussy.
- Warm interiors: lead with antique gold, champagne, and ivory.
- Cool interiors: use silver, platinum, clear glass, and pale blue-gray.
- Neutral interiors: combine muted gold with crystal for contrast.
- Dark interiors: add polished accents sparingly to create luminous punctuation.
Rosé gold can bridge warm and cool finishes, but it should remain a slender accent rather than a second dominant metal. Likewise, crystal needs breathing room. When every object glitters, nothing feels precious. Leave calm surfaces between reflective pieces; luxury often arrives through restraint.
Elevating Shelves and Consoles with Vases, Bowls, and Decorative Objects
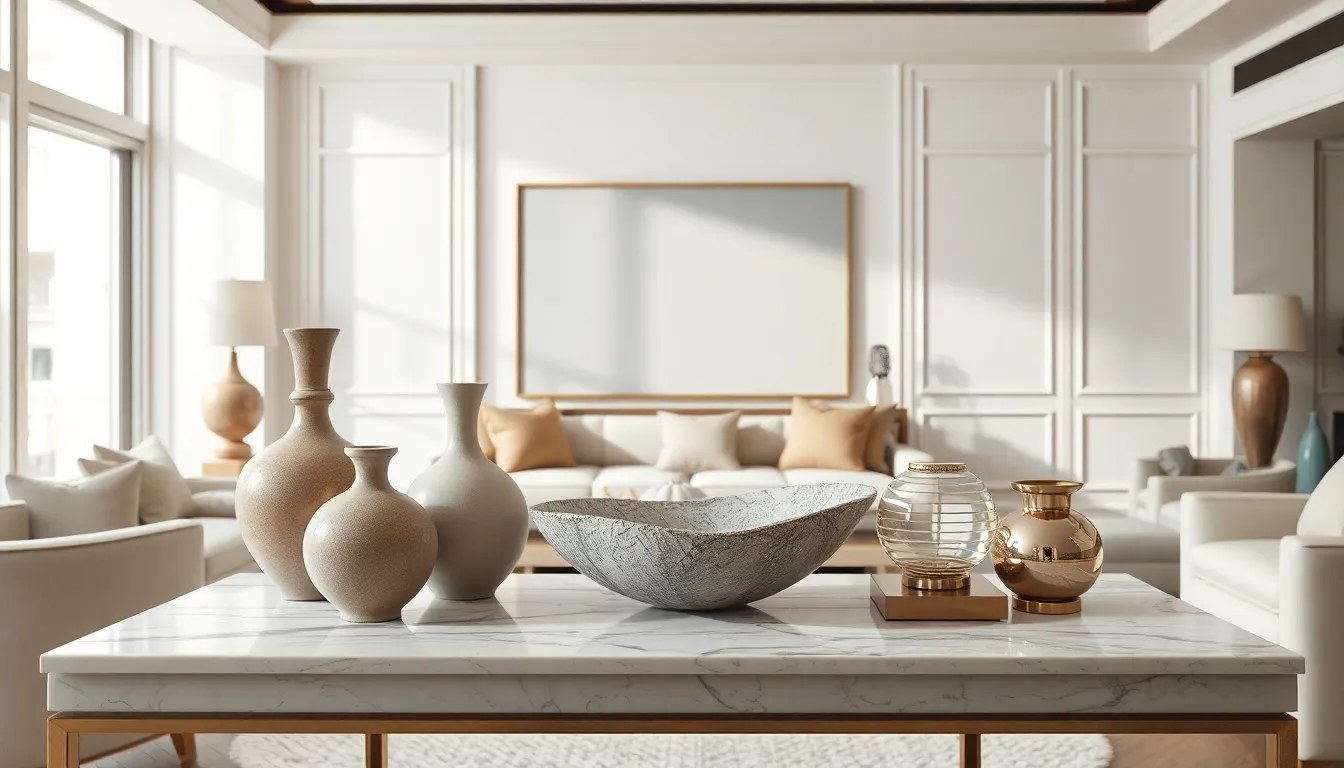
Vases, bowls, and sculptural objects give a console or shelf a strong visual rhythm. Begin with the furniture itself. Measure its width, depth, and clear space above it before choosing décor. A tall arrangement needs room to breathe, while a shallow shelf calls for low profiles that do not block artwork or sight lines.
Use height to create movement. Place one dominant vase or vessel toward one side, then balance it with two smaller pieces at different levels. This asymmetrical structure feels collected rather than staged. A stack of two or three slim books can raise a small bowl, but avoid unstable piles, especially in busy hallways.
Scale is the quiet luxury test. On a wide console, a vessel around 25 to 35 centimetres tall often creates enough presence without swallowing the surface. For a narrow shelf, choose objects under 15 centimetres deep. Always leave part of the tabletop visible; negative space keeps the arrangement useful and composed.
- Console centre: reserve the middle for a single low bowl when the surface must remain practical.
- Console corner: use a tall vase beside a shorter object to form a gentle diagonal.
- Open shelving: alternate dense pieces with empty sections so the display does not become visually muddy.
- Fireplace mantel: keep fragile objects away from heat and allow safe clearance above the opening.
Vases do not need flowers to look complete. A dry branch, one sculptural stem, or no filling at all can reveal the vessel’s silhouette. Bowls work differently: they invite a controlled grouping of small objects, but too many loose items turn refinement into clutter. Select three related pieces at most, and vary their shape rather than their finish.
Think in layers from front to back. A low tray can anchor a composition, a bowl can add a middle plane, and a taller object can draw the eye upward. Keep handles, drawers, switches, and walking routes clear. Pretty décor that obstructs daily use is not luxurious; it is merely in the way.
For a curated look, repeat one formal detail across the room, such as a fluted edge, sculpted curve, or hammered surface. Do not match every object. A little tension between smooth ceramic, carved stone, and cast metal gives the arrangement character—and makes it feel less like a showroom.
Framing Special Moments with Elegant Decorative Frames
An elegant frame does more than hold a photograph. It gives a personal memory a defined boundary and turns a small image into part of the room’s architecture. This makes framing especially useful on consoles, bedside tables, desks, and intimate gallery walls.
Choose the frame by considering the image first. A quiet portrait suits a restrained border, while a lively travel photograph can handle a more sculptural profile. For formal rooms, bevelled edges, embossed details, or hand-finished surfaces add depth. In a relaxed setting, natural texture and softer contours prevent the display from feeling overly ceremonial.
Proportion controls the result. A small photograph may need a wide mount to gain presence, while a large image often looks stronger with a narrow border. Leave enough visual margin around the picture so its subject does not appear squeezed. The frame should support the story, not compete with it.
- For a console: place one large portrait or a pair of related images at eye level.
- For a bedside table: choose a compact frame with a stable rear support and rounded corners.
- For a desk: use a vertical format to draw the eye upward without taking much surface space.
- For a gallery wall: repeat one structural detail, while allowing image sizes to vary.
Glass choice also affects presentation. Standard glazing suits low-light areas, while anti-reflective glazing improves clarity near windows and lamps. UV-filtering glass can help reduce fading, though it does not make photographs immune to sunlight. Keep valuable prints away from strong direct exposure and humid rooms such as bathrooms.
Use photographs with a shared emotional thread rather than identical subjects. Family portraits, architectural details, and monochrome travel images can sit together when their contrast and cropping feel related. A thoughtful frame turns this collection into a visual pause—quiet, personal, and more memorable than a random cluster of objects.
Adding Sophisticated Detail with Boxes, Trays, Games, and Desk Accessories
Boxes, trays, games, and desk accessories bring purpose to a decorative arrangement. They are not mere fillers. Each piece can store, organise, or invite use while adding a deliberate note to the room.
Choose boxes for items that should stay close but out of sight: keys, correspondence, remote controls, or jewellery. A lidded box with a firm hinge and a smooth interior feels considered in daily use. Check the dimensions before buying; a beautiful container is less useful when it cannot hold the objects meant for it.
Trays create order on broad surfaces. Use one on an ottoman for entertaining essentials, on a sideboard for bottles and glasses, or on a desk for small tools. Handles improve portability, while a low rim keeps objects secure. Leave part of the tray visible so its outline remains clear.
Decorative games add a social layer to an exquisite room. Chess, backgammon, and domino sets can function as display pieces when their cases, boards, and playing pieces are well made. Place them where guests can reach them. A game hidden behind glass may look polished, but it loses its invitation.
- Entryway: use a compact lidded box for keys and small daily essentials.
- Living room: select a tray that can move easily from a table to a serving surface.
- Guest room: add a small writing set or covered box for practical courtesy.
- Home office: group only the tools used often, then hide spare supplies elsewhere.
Desk accessories deserve special attention because they remain in view for long periods. A pen cup, letter opener, paperweight, and document holder should share a visual language without becoming a matching set. Keep working tools within one arm’s reach and place ornamental pieces slightly beyond that zone.
Material choices should suit the level of handling. Leather, lacquer, stone, wood, and metal each age differently. Felt bases help protect finished furniture, while rounded edges reduce scratches and soften the arrangement. Small details separate lasting quality from surface sparkle.
Limit the number of functional accents on one surface. One useful group usually feels richer than a crowded collection of attractive things. The best arrangement lets every object earn its place—quietly, practically, and with a touch of wit.
Creating a Glamorous Christmas Tree with Layered Glass Ornaments
Begin with the lights already installed and switched off. This reveals the tree’s natural gaps and lets you place ornaments for structure rather than relying on sparkle to hide weak areas. On a full 8-foot tree, large baubles can anchor the lower and middle zones, while smaller pieces suit the upper branches.
Use a three-layer system. First, hang the largest glass ornaments deep inside the branches. They create shadow, depth, and flashes of colour between the needles. Next, place medium ornaments near the branch tips. Finish with a small number of delicate pieces at the front, where their surface and shape can be seen clearly.
Glass ornaments need secure support. Inspect each cap, hook, and thread before hanging it. Place heavier pieces close to the trunk or on strong inner branches. Use florist wire or reinforced ornament hooks for valuable decorations, particularly in homes with pets, children, or frequent movement around the tree.
- Use oversized pieces to establish the main visual anchors.
- Place medium ornaments in loose vertical groups rather than random clusters.
- Reserve fragile, highly detailed glass pieces for stable inner or middle branches.
- Keep lightweight ornaments near the tips, where they will not pull down the foliage.
- Turn some ornaments sideways so the tree has depth from every viewing angle.
Do not distribute every ornament evenly. Luxury displays benefit from controlled irregularity: a fuller group on one side, a quieter gap on the other, then a small visual echo higher up. Walk around the tree as you work. A composition that looks balanced from the sofa may appear sparse from the entrance.
Inspect painted, glittered, and mercury-style surfaces for care limits before storage. Avoid forcing ornaments onto tight branches, and keep glass from touching metal hooks or hard decorations. Tissue paper, divided boxes, and a dry storage area will help reduce scratches, tarnish, and sudden temperature damage.
A layered tree should reveal something new each time someone passes it. A deep glint behind a branch, a pale sphere turning slowly, or a tiny ornament noticed only on the third look creates the charm. More decoration is not always more glamour; thoughtful placement does the heavy lifting.
Finishing the Tree with Garlands, Picks, Ribbons, and a Statement Topper
Garlands, picks, ribbons, and a topper give the tree its final direction. Add them only after the main ornaments are secure, then work from the trunk outward. This order prevents long strands from hiding carefully placed details.
Start with the garland. A six-foot strand suits a small tree or a short vertical section, while a ten-foot strand offers more freedom on a taller display. Drape it in relaxed diagonals rather than tight horizontal rings. Let each curve follow the tree’s natural taper, with slightly deeper swags near the lower branches.
Insert picks where the silhouette feels thin. Icy branches, magnolia forms, and glittered stems should point in different directions, not all face forward. Bend wired stems gently before placement, then secure them close to sturdy branches. This creates outward movement and makes the tree appear broader without adding another dense layer.
- Garland: use it to guide the eye from the upper section toward the base.
- Ribbon: fold, loop, or cascade it in broad sections instead of wrapping it tightly.
- Picks: place them in small groups near empty edges and around the centre line.
- Topper: choose a form with a stable stem or clip, then anchor it below the highest tip.
Ribbon needs enough length to form generous folds. A 30-foot roll may cover a large tree, but the exact amount depends on the width of the ribbon and how loosely it is arranged. Tuck the material into branches at several points. Never rely on a single tie, especially when the fabric has a heavy wired edge.
The topper should extend the tree’s shape, not simply sit on it. A beaded snowflake, starburst, spray of branches, or clustered bow can work well. Keep the highest point clear of ceilings, sprinklers, and nearby fixtures. For safety, avoid placing a heavy topper on a flexible treetop that bends sharply.
Take a final view from the room entrance, the seating area, and the side. Adjust any strand that forms an accidental dark band or any pick that creates a stiff outline. The finished tree should feel animated but not overworked—like it knows exactly where the party is.
Completing the Festive Setting with Tree Collars, Skirts, Wreaths, and Deer
A tree collar gives the base a finished architectural edge while concealing the stand, cords, and lower trunk. Measure the stand and allow clearance for watering or access panels before choosing one. A 32.5-inch collar can suit a compact display, but the correct diameter depends on the tree base, not only its height.
A tree skirt offers a softer alternative. Select a 60- to 72-inch diameter according to the spread of the branches and the surrounding floor area. Place it flat, with the opening centred, and keep the fabric away from candles, heaters, and walkways. Faux fur adds softness; beaded or embellished fabric creates a more formal finish.
Use a wreath to connect the tree with the rest of the room. A 28-inch wreath works well on many interior doors, cabinets, or walls, but always check the hanging point and the surface weight limit. In a small room, one wreath can provide a clear seasonal accent without competing with the tree.
- Hard collar: best for a crisp, tailored base and easy floor cleaning.
- Textile skirt: useful when softness and warmth matter more than structure.
- Wreath: place it where it frames an entry, mirror, or window without blocking movement.
- Decorative deer: use one figure as a quiet focal point, or pair two figures with a clear difference in height.
Decorative deer should relate to the room’s scale. A small figure suits a console or mantel, while a larger sculptural piece needs open floor space. Keep it stable, especially near doors or paths. Outdoor placement requires materials rated for exterior use; indoor finishes may fade, corrode, or crack in damp weather.
Consider sight lines before final placement. The base should look complete from seated height, while the wreath should read clearly when someone enters the room. Leave enough distance between the tree, furniture, and surrounding décor for cleaning and safe movement. This keeps glamour from becoming a trip hazard.
For storage, remove embellishments from textiles before folding them whenever possible. Store skirts and wreaths in breathable covers, and protect rigid collars from pressure that could bend or chip their finish. A little care now keeps next season’s setting polished rather than rumpled.
Choosing the Right Tree Shape, Height, and Lighting for a Grand Display
The tree’s shape sets the visual character of the entire display. A full profile feels abundant and traditional, while a slim profile suits apartments, narrow rooms, and spaces where furniture must remain easy to use. A pencil shape works in tight corners, but it offers less depth for large ornaments. Choose a dense, wide form when the tree itself should feel like a major architectural feature.
Height should be measured from the floor to the ceiling, not guessed from the tree label. Reserve at least 15 to 30 centimetres above the highest decoration, depending on the topper and the ceiling fixture. An 8-foot tree can work well beneath a standard 9-foot ceiling, while a lower room may need a 5.5- or 6.5-foot model to avoid a cramped finish.
Check the base diameter before ordering. A tall tree with a broad footprint may block a passage or crowd a cabinet. Mark the intended width on the floor with removable tape. This simple outline shows whether doors open freely and whether people can walk past without brushing the branches.
- Low ceiling: choose a shorter tree and use vertical decoration rather than extra height.
- Open living room: select a fuller silhouette that can be viewed from several angles.
- Narrow corner: use a slim or pencil profile with a controlled front-facing arrangement.
- Large entrance: consider a tall, full form only when the base leaves a clear walking route.
Lighting type affects both maintenance and atmosphere. Integrated lights create a clean result and reduce the time needed for installation. Unlit trees offer greater freedom: you can replace failed strands, change colour temperature, or remove lighting outside the festive season. Warm white light usually flatters gold and champagne finishes; cooler white can sharpen silver and icy glass.
Check the light specification before buying. Look for LED bulbs, replaceable sections, protected connectors, and a suitable voltage for your home. LED systems use less energy and produce less heat than older incandescent sets, but every connection should still remain dry and free from crushed wires. For an outdoor display, use products marked for exterior use and connect them to a properly protected outlet.
Finally, assess the tree when the room is both bright and dim. A beautiful silhouette can disappear at night if the branches are too sparse, while intense lighting can flatten its form. The right choice leaves enough structure for decoration, enough clearance for safe movement, and enough breathing room overhead. That balance makes a grand display feel effortless rather than oversized.
Styling Luxury Ornaments by Room and Focal Point
Luxury ornaments work best when each room has one clear focal point. Instead of spreading decorative pieces across every surface, decide where the eye should land first. Then use smaller accents to support that point without competing for attention.
In the entryway, place one memorable object where it can be seen as soon as the door opens. A sculptural vessel, a covered box, or a polished decorative figure can define the arrival experience. Keep the drop zone practical: leave space for keys, bags, and movement. Beauty should not create an obstacle.
In the living room, build the main display around the seating view. A mantel, coffee table, or media console can serve as the visual anchor. Choose an arrangement that looks complete from the sofa, then check it from the doorway. Low ornaments work well on coffee tables because they preserve conversation and sight lines.
In the dining room, select pieces that support conversation rather than block it. A shallow centrepiece, a pair of small vessels, or a low sculptural bowl can decorate the table without obstructing faces. For formal dinners, remove fragile objects before serving hot food or placing crowded dishes.
In the bedroom, keep the mood quieter. Place one refined object on a nightstand, dresser, or window ledge, and avoid sharp edges near the bed. Small decorative details can make the room feel finished without adding visual noise at the end of the day.
In the home office, use ornaments to soften hard lines around the desk. A single stone paperweight, a small object beside a monitor, or a discreet box can add character. Keep the centre of the work surface open so the decoration supports concentration instead of becoming another task.
- Entryway: create an immediate point of arrival.
- Living room: support the primary seating view.
- Dining room: preserve clear sight lines across the table.
- Bedroom: favour calm, low-impact details.
- Office: decorate the edges and protect the working zone.
Use height changes between rooms to create a natural progression. A tall focal point near the entrance can lead toward lower pieces in the living area, while intimate details in the bedroom provide a softer conclusion. This gives the home a visual narrative without making every room look identical.
Pay attention to sight lines through open-plan spaces. An ornament that looks elegant from one angle may appear oversized from the kitchen or hallway. Walk the main routes, open nearby doors, and check the display in daylight and evening light. Small adjustments can make the whole home feel more intentional.
Seasonal objects deserve a planned exit. Choose pieces that can move to a secondary room when the main display changes, rather than buying accents with only one possible location. That flexibility protects the room from clutter and lets treasured ornaments remain useful long after the celebration ends.
Fazit: Curate Fewer, Stronger Pieces for a Polished Home
Luxury feels most convincing when every ornament has a reason to be there. A polished home does not need a full surface or a crowded tree. It needs pieces with lasting appeal, sound construction, and a clear relationship to the people who use the room.
Before adding anything new, assess the collection as a whole. Remove damaged items, unclear duplicates, and objects that no longer suit the space. Keep the pieces that carry memory, craft, or genuine visual strength. This edit makes future purchases more deliberate and reduces seasonal waste.
Quality also includes responsible ownership. Check care instructions, repair small defects early, and store each ornament according to its material. Keep an inventory with photographs, dimensions, and storage locations. It sounds slightly fussy, but it saves time and prevents accidental purchases next year.
- Buy for longevity: favour replaceable parts, durable finishes, and materials suited to your home.
- Buy with a plan: record where each piece will live before bringing it home.
- Protect the collection: use labelled storage and separate fragile surfaces.
- Review annually: keep, repair, donate, or recycle with intention.
Luxury is also measured by comfort and safety. Secure unstable objects, keep fragile pieces away from busy routes, and follow manufacturer guidance for electrical decorations. If children, pets, or older adults share the home, adapt placement rather than sacrificing the entire design.
The strongest collection grows slowly. One exceptional vessel, frame, box, or seasonal ornament can contribute more than a dozen forgettable accents. Choose pieces that you will still enjoy after the first impression fades. That is the difference between decoration and a considered interior: the room feels complete, yet never closed to the next beautiful discovery.
Frequently Asked Questions About Luxury Decorative Ornaments
How can decorative ornaments make a home feel more luxurious?
Choose fewer, well-crafted pieces with refined materials, balanced proportions, and a clear relationship to the room. A sculptural vase, elegant frame, decorative box, or polished object can create a sophisticated focal point without overcrowding the space.
Which materials are best for an elegant decorative arrangement?
Glass, crystal, metal, stone, lacquer, wood, ceramic, and leather can all contribute to an elegant arrangement. Combine contrasting textures thoughtfully, such as polished metal with matte stone or clear glass with softly finished wood, while keeping the overall palette cohesive.
How should luxury ornaments be arranged on shelves and consoles?
Create visual movement by combining different heights, shapes, and depths. Use one dominant piece, support it with smaller objects, and preserve negative space between groups. Keep drawers, switches, walkways, and practical surfaces unobstructed.
How can decorative ornaments be used for seasonal displays?
Build seasonal displays around a defined focal point, such as a decorated tree, mantel, entryway, or dining table. Layer ornaments with complementary accents, vary the scale, and leave calm areas between reflective or highly detailed pieces so the arrangement remains refined.
How should valuable decorative ornaments be maintained and stored?
Follow the care instructions for each material, inspect fragile parts regularly, and protect surfaces from scratches, moisture, heat, and direct sunlight. Store delicate ornaments separately in labelled, padded containers and keep seasonal textiles in breathable covers.